It is very important that clean water flows from every tap in the house. Homeowners naturally expect safe and high-quality water for all their daily needs. The water that enters the home contains contaminants such as chlorine, sediment, heavy metals, and other particles that affect both taste and quality.
The water filtration system addresses this problem at the source, providing clean, impurity-free water. This not only purifies drinking water but also purifies water used for other household activities, including the shower, dishwasher, and laundry. Therefore, it is important to understand how water filters function and how they are installed.
What to Consider Before Installation?
Before you install the water filtration for your home, here are certain factors to consider
- Homeowners should check the installation requirements before buying a whole-house filtration system for a whole house . This ensures the unit will actually work in the home.
- Water filter systems often come in different sizes, and most will need to be installed indoors or in a protected space.
- Not every system fits all types of household fittings; it is important to confirm that the purchased one will work for the household’s fittings.
- Overlooking this step may lead to the hassle of returning the filtration system or to a filter that does not install properly.
Steps to Install Water Filtration
Here are a few easy but important steps to install a whole-house water filtration system.
Choose Filter Location

The first step is selecting the right location for the whole-house filter. Homeowners should look for the main water line entering the home, which is often located near the pressure tank or water meter.
After locating the main line, find a spot with enough room on all sides to fit the filter unit. It is essential to ensure the chosen location is easily accessible for future filter replacements and maintenance.
Turn Off the Water Supply
Before beginning any installation work, turn off the main valve, which is usually located near the water meter.
Drain the Water
After shutting off the main water supply, a faucet somewhere else in the house should be turned on. This helps release any built-up pressure in the pipes that will be removed in the next step. The faucet should ideally stay open throughout the installation process.
Remove a Section of the Pipe
The next and important step involves marking and cutting the pipe to make space for the filter system. Here are the key steps for removing a section of the pipe.
- For a whole-house water filter with a single unit and no separate filter, homeowners should use the template that comes with the filtration system.
- The pipe must then be marked at the exact installation location.
- Following the manufacturer’s instructions is important to ensure that enough pipe is cut to make space for the filter and any connected fittings.
- For filters with two separate units, a pre-filter and a carbon filter, it is best to cut away the section that accounts for two tees and a shutoff valve.
- The length and setup should work efficiently for the available space.
- Before cutting, clean the marked area of the pipe with an emery cloth. A pipe cutter should be used to make two cuts at the marked spots.
- The section of the pipe where the filter will be placed should be removed. It is safe to place a bucket under the line to catch any remaining water.
- After cutting, burrs on the cut pipe should be removed using a reamer or deburring tool.
Install Tees and By-Pass Shut-off Valve

Water filtration systems come with filters that require frequent replacement, and this frequency depends on the model. Pre-filters usually need to be replaced every 6 months or so. However, carbon filters last much longer, sometimes up to several years.
Installing shut-off valves and bypass valves makes filter changes easier and allows the water system to continue operating while filters are being changed. For units with a pre-filter, a copper tee should be installed on each side of the cut pipe section. These copper tees should be connected with a pipe and a ball valve in between. Make sure to dry-fit the sections first to ensure they fit. Units without a pre-filter can skip this step.
Add Two Shut-Off Valves
For installing a unit without a pre-filter, a ball valve should be installed on each side of the pipe, along with the necessary fittings to connect the filter unit. Everything should be dry-fitted first to ensure it aligns well.
For units with both a pre-filter and a carbon filter, they must be mounted according to the manufacturer’s instructions. The tees should next be piped to the filters, with ball valves added between each tee and its corresponding filter. The necessary fittings should be piped to the respective filters.
Once everything is connected, the bypass valves stay closed, and the two valves feeding the filters remain open. When the system becomes clogged and slows water flow, or when filters need replacement, the two valves can be closed and the bypass valve opened.
Test for Leaks
The final step is checking the installation work that has been done. Homeowners should inspect the inlet, outlet, and other valves or ports on the new filter system. Everything needs to be completely closed off and sealed to catch potential issues before they become bigger problems. Once all the connections look secure and tight, the main water supply can be slowly turned on.
Filter Types and Sizes

Water filters come in different types, which define how they filter water. Here is an overview of the different types and sizes of water filtration systems:
- The main filter types include ion-exchange systems that soften water, reverse osmosis systems, and carbon filtration systems.
- Filter systems also come in different sizes to match the kitchen layout and personal preferences.
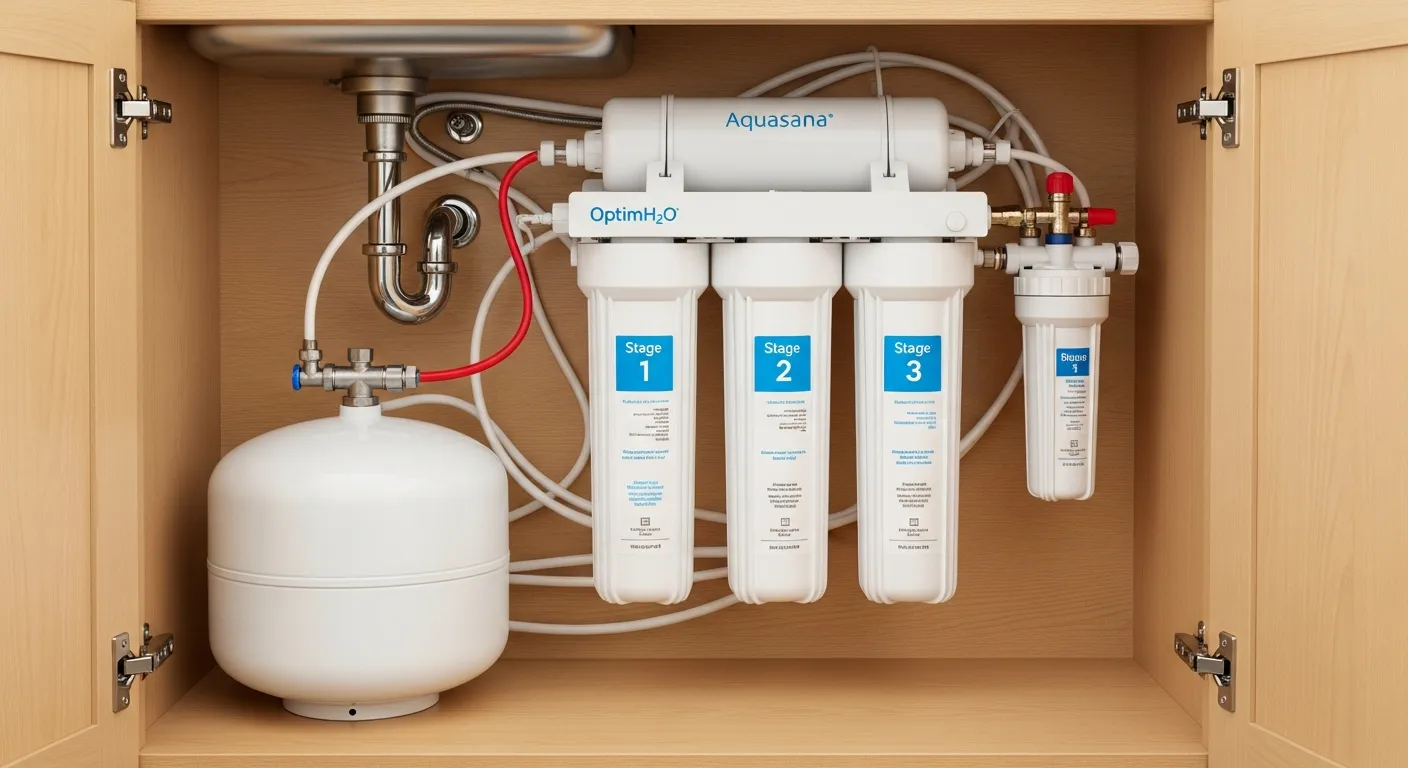
- The size options include countertop models, under-sink installations, and whole-house systems.
- The cost to purchase and ease of installation for those doing it themselves depend on the type of system, scale, and complexity.
Conclusion
Water filtration systems come in various types and sizes, and their prices depend on the filters homeowners choose. The decision also depends on the contaminants present in the water supply. The installation process can be done by homeowners themselves. However, if the task feels difficult to manage, it is best to seek assistance from an experienced plumbing professional.